
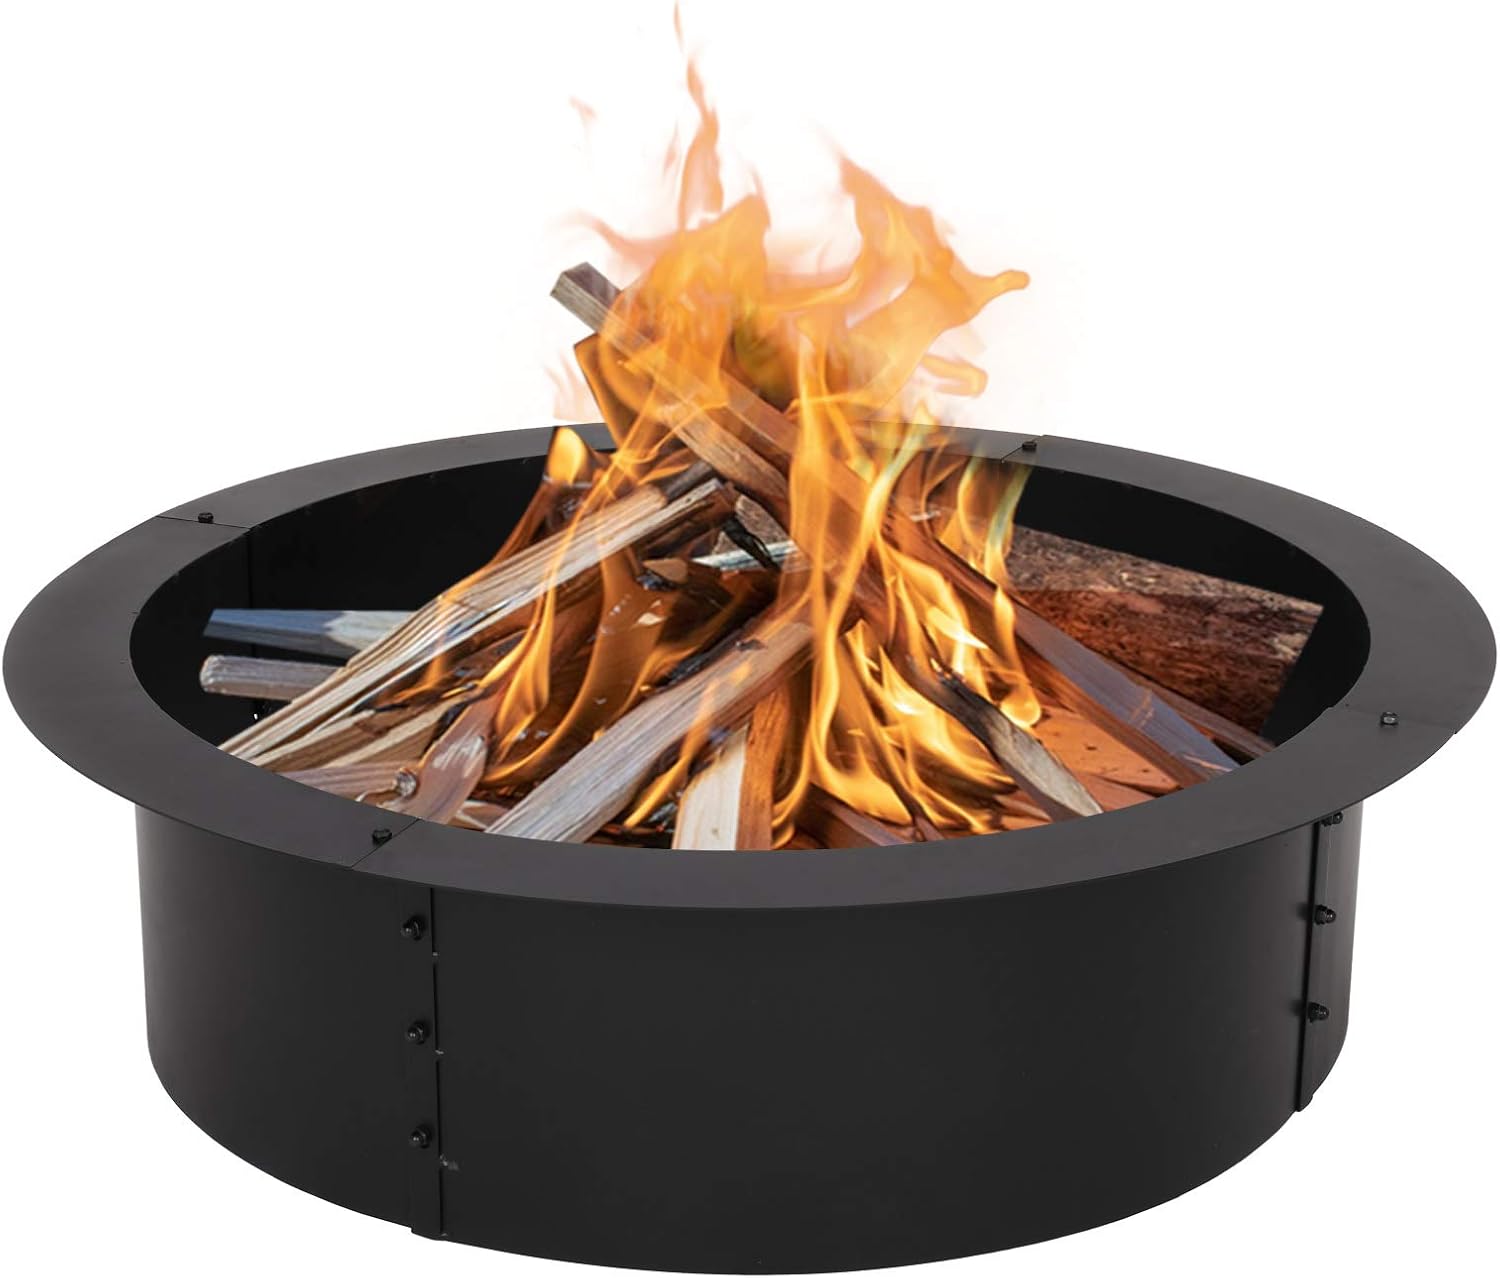
VINGLI 36-Inch Outer, Galvanized Fire Pit Ring 2.0mm Thick Heavy Duty Solid Steel 30-Inch Inner, Metal Fire Pit Liner DIY Campfire Ring Above or In-Ground for Outdoor, Backyard
$ 28.76
I built a 30” diameter fire pit, 3 courses high, from the larger Ashland “stones” that Lowes sells. Lowes also sells a ring separately or as a kit with 36 stones. We used it a few times and it was a bit Smokey and irritating. I watched several YouTube videos on how to construct a smarter fire pit. So, being the Engineer (retired), I accepted my wife’s challenge. The results were outstanding. BTW, there is an erronous review here. The OD of the flange is 36″. The ID of the ring itself is 30 1/2″. That is detailed in the product description.To set the scene, we built the 3 tier (12 stones per layer or tier) on the ground (hard packed clay). We then added about an inch to 1 1/2 inch of crusher run gravel and then added a later of pea gravel about 2” high. So we have about an inch or so of the lower layer visible.I assembled the ring and then “force” or friction fitted it into the the fire pit. That way, the top flange was seated and the ring was anchored in place. Then I removed the two layers. I had run intake & exhaust calculations and determined that simply removing TWO of the lower stones and using only 10, equally spaced, would give approximately 80 sq inches of intake. I had determined that I would cut or bore 32 holes near the top, right under the flange, in the ring. That was based on using a 1 1/2” hole saw (Lenox T3 on Amazon). I made a gage block from a 2 x 4 so that the center of the line of holes would be down about 1 5/8″. The 2” side measures about 1 5/8 and the diameter is 3/4” so that left 7/8” of metal under the flange. I played with the layout and used a spacing of 2 7/8 “ centers for the holes. 8 of them left about 2” on each end of each section. This is NOT that critical, but I wanted it to look professionally cut and not “red neck”. So, 32 holes calculates to 58 sq inches of so. About 1/3 more intake than exhaust. GOOD DESIGN. I drilled pilot holes 1/8” and then opened them up to 1/4”. Therefore, the drill bit with the Lenox does not get dull.I used a battery drill for the holes but have a HD 1/2” for the hole saw. BE CAREFUL. The Lenox bit, if you remove the 1/4″ drill bit, has a flat cut to hold the arbor to the bit and it snapped after 10 holes. I used a piece of pointed 1/4” drill rod as a pilot or guide. Don’t force the hole saw or “wallow it around”. All the holes were cut. I cleaned the burrs with a round file. I then sprayed the entire ring with 800 dF Grill/Engine paint. Only took one can.I should have pointed out. I started to reassemble the fire pit, but only on 3 sides. So on section or or one quarter was open, but the entire ring was supported and fairly rigid. So, I drilled or cut the holes in place. MUCH easier. I then pulled the stones from the next quarter and replaced them in the previously drilled section. So I had the ring secured in place rather than having to “fixture and hold” it. I did use one stone for support, and moved it a smidge. MUCH easier than having my wife sit or hold the ring while I cut the holes.Then I pulled the ring for painting and sat it on two sawhorses.I reassembled the second row of 10. I left about 1 – 1 1/2 inch of free space or air gap between the inside edges of the lower (second tier) so the “chimney would draw”. Next, I added the third ring of 12….again spaced out about 1 – 1/2” for the air gap. It was EASY to gage as you can put your finger through the holes to gage or adjust the gap.Then, added a fourth layer or tier of 12 stones. They were pushed in about 1/2” further than the third tier….do it based on looks. I let my wife adjust or “approve” the 10 stone layer and the next and then, finally, the top. She is HAPPY.We have used it several times. The ring nicely overlaps the bottom layer of bricks. There was a decided improvement in the quality of the fire and the reduction of the smoke. NOW…unless you build a blacksmith’s forge, you will have some smoke….but this design with the air gap and the holes radically improves our enjoyment.I chose THIS ring as it was the thickest one that Amazon had. It was about 70% of the thickness of Lowes ring….but the Lowes ring was much shorter and I wanted more height or “chimney” area for the convection air currents that help the combustion and the smoke.WE ARE HAPPY….and my GK’s really love it as they complained about the smoke.Highly recommend….it should last a long time. Do NOT think the steel will never rust. It will. $8 worth of paint and a 30 minute job every few years is a small price…
Related products
-
PT Cruiser FirePower Ignition Kit
Read More This product has multiple variants. The options may be chosen on the product page -
Ford Explorer 5.0 Firepower Ignition Kit, 1995-2001
Read More This product has multiple variants. The options may be chosen on the product page -
Chevy 4.3 Firepower Ignition Kit
Read More This product has multiple variants. The options may be chosen on the product page -
Jeep 5.2/5.9 Liter Firepower Kit (1993-1999)
Read More This product has multiple variants. The options may be chosen on the product page